How to use OAuth 2.0 to secure your Vue.js application and Quarkus REST API with Keycloak
Introduction
In this post I’ll show you how to use OAuth 2.0/OpenID Connect to secure a Vue.js application interacting with a REST API.
You can find all the (commented) code on GitHub.
If you are developing a Vue.js app and you’re not sure how to implement OAuth this is for you!
What you will not find is a deep dive into how OAuth works. If you are new to this topic I recommend you to start working through the links at the end of this post.
Background
In my first blog post I wrote my own authentication implementation using JSON Web Token (JWT).
When it comes to security it is best left to the experts. I’m not one of them…
But I want to sleep at night without worrying that I made a mistake and all the data stored in my application was stolen or corrupted. Therefore I decided to find a more sophisticated solution.
At the start of my journey I only knew the following things:
- I want to use Vue.js to write the web application
- I want to use Quarkus to write the backend (I’m a Java developer during the day.)
- I want to use open source software that can be self-hosted
- I want to use prooven industry standards (Did I mention that during the day I write Java enterprise software?)
Thanks to my first blog post I had some experience with JWT. Pretty quickly I stumbled upon OAuth 2.0. The wonderful people of the Quarkus project provide an excellent guide, describing how to secure your API using Keycloak. With that guide I was more or less half way there (or so I thought).
I had an authentication provider and knew how to secure my backend. So the only thing missing is the frontend.
This is where things got a little more complicated. As awesome as Keycloak is, their documentation is lacking some depth. If you have no prior knowledge their documentation is at times not detailed enough. But the more I learned about OAuth the more I understood the documentation.
Keycloak provides a wide range of so called “adapters”. These adapters are clients that can interact with the Keycloak server and handle all the heavy lifting. Due to the lack of in-depth documentation (and my lack of knowledge) all my experiments with the Keycloak JavaScript adapters didn’t work out too well. I was able to send the user to the login page and process the callback. But anything in terms of refreshing the access token failed.
It was one late night that I found Scott Brady’s blog. One of his posts describe how to use the oidc-client to secure an Angular application using the authorization code flow with the PKCE. “Flows” are different types of ways an application interacts with the authentication provider (in my case Keycloak) to authenticate a user. They differ in terms of what information is trusted to be stored in the application.
You wouldn’t for example trust your web application with the credentials to access the authentication server directly. Since this information would be available in the browser of the user.
On the other side you have backend applications. It runs on a secure server and we can store the credentials on it.
His blog post led me to this draft of the Internet Engineering Task Force (IETF). It describes the current best recommended practice on how to secure a web based application. (I wanted industry standards… There I found it!)
With this I had everything I needed:
- Frontend: Vue.js
- Backend: Quarkus
- OAuth provider: Keycloak
- Authentication flow: Authorization Code Flow with PKCE
For the frontend I decided to follow Scott’s example and use the oidc-client mentioned in his post. With a better understanding of how things should work I finally started implementing them.
How it works
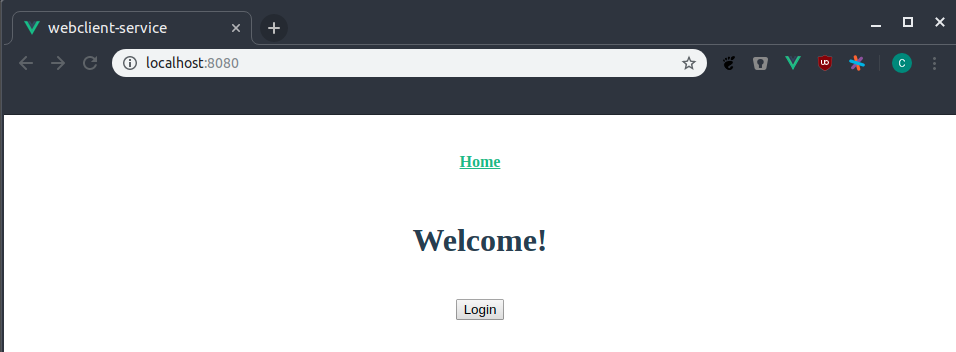
The user opens the application, sees a greeting message but can’t do anything except click the Login button.
Most of the authentication related code is found in src/auth.js. In there we import the UserManager from oidc-client…
import { UserManager, WebStorageStateStore } from 'oidc-client'
…configure and create it…
/**
 * Config for the oidc client.
 */
const settings = {
  // Where the tokens will be stored
  userStore: new WebStorageStateStore({ store: window.sessionStorage }),
  // URL to the authentication server (including realm)
  authority: 'http://localhost:8180/auth/realms/auth-example',
  // The name of the client in Keycloak setup for this service
  client_id: 'webclient-service',
  // Where to redirect the user to after successful authentication
  redirect_uri: 'http://localhost:8080/login',
  // Where to redirect the user to after logging the user out
  post_logout_redirect_uri: 'http://localhost:8080/logout',
  // Indicate the the authorization code flow should be used
  response_type: 'code',
  // "openid" tells the server that this client uses oidc for authentication
  scope: 'openid',
  // Enable automatic (silent) renewal of the access token
  automaticSilentRenew: true
}

let userManager = new UserManager(settings)
…create a wrapper (AuthService) for convenience reasons…
/**
 * Class to encapsulate all authentication related logic.
 */
class AuthService {
  /**
   * Initate the login process.
   */
  login () {
    userManager.signinRedirect()
      .catch(error => console.log(error))
  }

  logout () {
    userManager.signoutRedirect()
      .then(() => console.log('User logged out'))
      .catch(error => console.log(error))
  }

  /**
   * Handles the redirect from the OAuth server after a user logged in.
   */
  handleLoginRedirect () {
    // Returns a promise
    return userManager.signinRedirectCallback()
  }

  /**
   * Handles the redirect from the OAuth server after a user logged out.
   */
  handleLogoutRedirect () {
    return userManager.signoutRedirectCallback()
  }

  /**
   * Checks whether or not a user is currently logged in.
   *
   * Returns a promise which will be resolved to true/false or be rejected with an error.
   */
  isUserLoggedIn () {
    return new Promise((resolve, reject) => {
      userManager.getUser()
        .then(user => {
          if (user === null) {
            resolve(false)
          }
          resolve(true)
        })
        .catch(error => reject(error))
    })
  }

  /**
   * Get the profile data for the currently authenticated user.
   *
   * Returns an empty object if no user is logged in.
   */
  getProfile () {
    return new Promise((resolve, reject) => {
      userManager.getUser()
        .then(user => {
          if (user === null) {
            resolve(null)
          }
          resolve(user.profile)
        })
        .catch(error => reject(error))
    })
  }

  /**
   * Get the access token.
   *
   * Can be used to make requests to the backend.
   */
  getAccessToken () {
    return new Promise((resolve, reject) => {
      console.log('Get access token from user')
      userManager.getUser()
        .then(user => {
          console.log('Got access token from user')
          resolve(user.access_token)
        })
        .catch(error => reject(error))
    })
  }
}
…create an instance of AuthService and add it to the global Vue instance.
/**
 * Create and expose an instance of the auth service.
 */
export const authService = new AuthService()

/**
 * Default export to register the authentication service in the global Vue instance.
 *
 * This allows us to reference it using "this.$auth" whenever we are inside of a Vue context.
 */
export default {
  install: function (Vue) {
    Vue.prototype.$auth = authService
  }
}
Once the user clicks on Login the user is forwarded to the login screen of Keycloak.
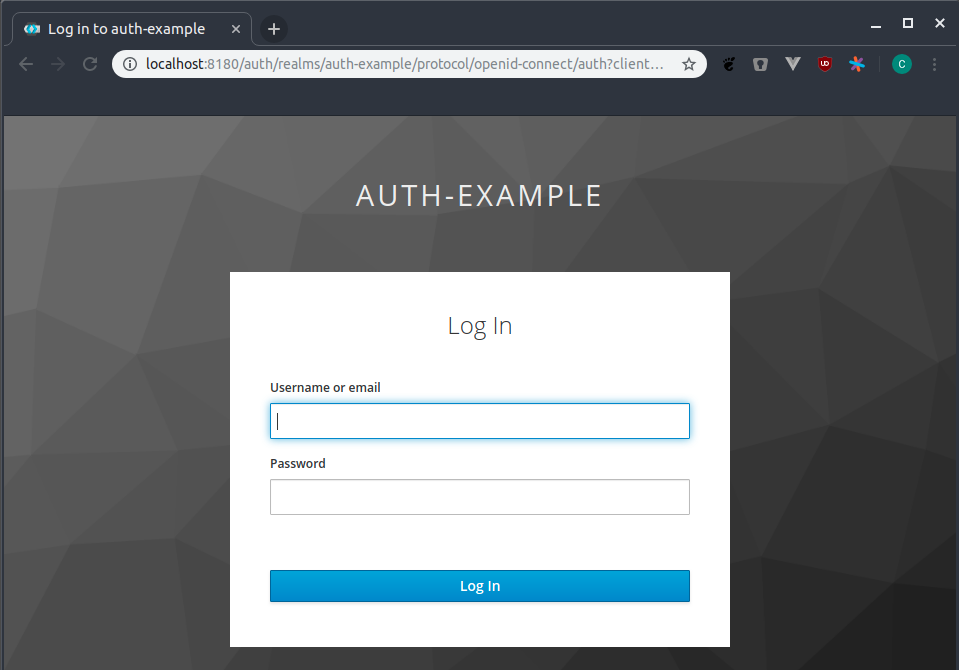
Did you notice how the URL (the port) is different to the one of our application?
This is because the user does not log into our application directly. The user authenticates with Keycloak. Our application will never know the username and password. This means that if your application is compromised you can’t loose any passwords. Depending on your application you don’t need to store any user data yourself. When storing user specific data in the database of your application just use the user ID provided by Keycloak.
If you decide to host Keycloak yourself you still have to make sure to setup the server securely. But you don’t need to worry on how to store the user data. This is done by the experts developing Keycloak.
Once the user successfully authenticated with Keycloak a callback to our application is executed to the route /login. Since we are using Vue.js we configure our src/router.js to handle this callback. Normally the router is responsible to send the user to the correct page. In our case it intercepts the call to the /login route and let the oidc-client handle it from there.
router.beforeEach((to, from, next) => {
  // Here we handle the login redirect and than send the user to the "/" route.
  if (to.path === '/login') {
    // Inform the authentication service that a user logged in. Afterwards we send the user to the main page
    authService.handleLoginRedirect()
      .then(() => next('/'))
      .catch(error => {
        console.log(error)
        next('/')
      })
  }
  [...]
})
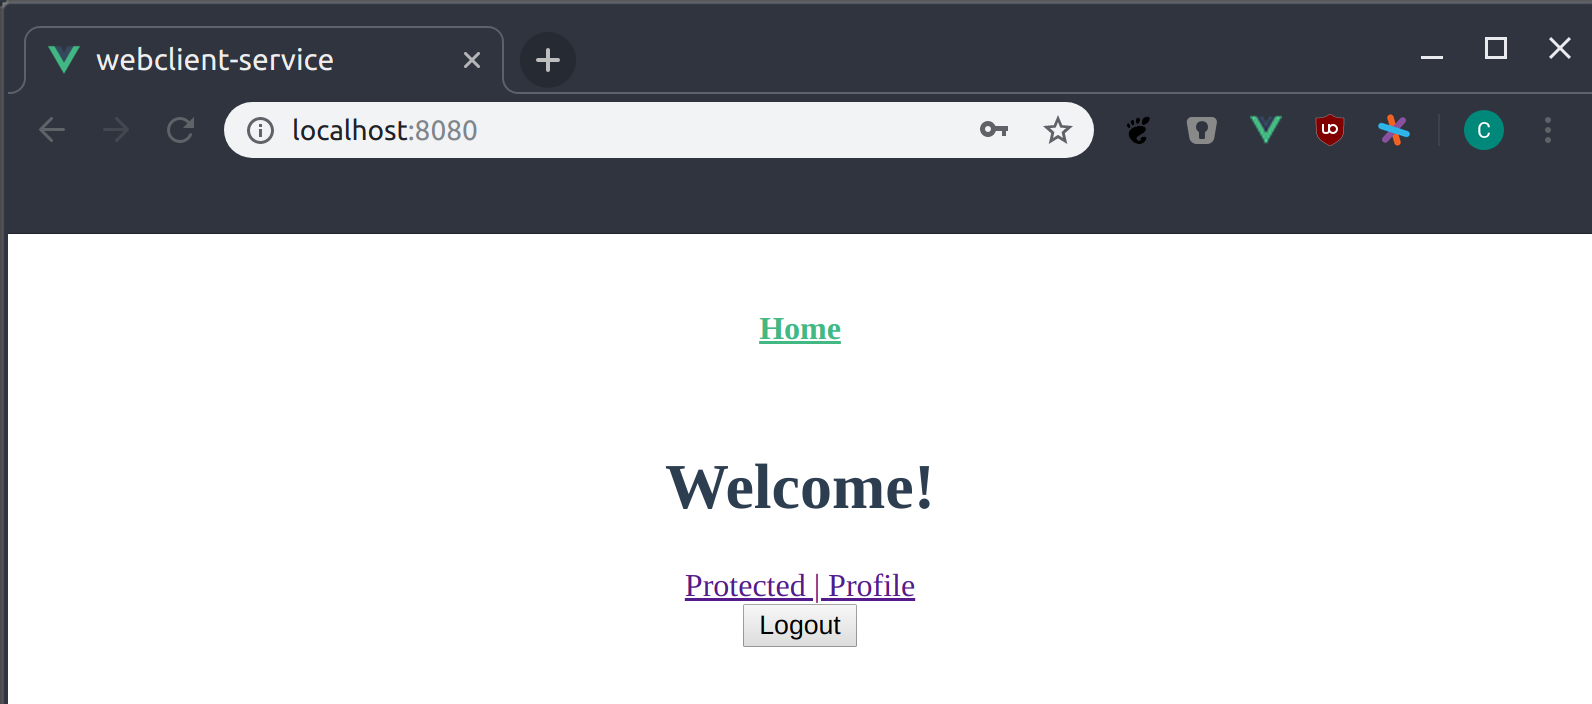
The user is now authenticated and can see two additional links. (And the Login became the Logout button.)
We determine if the additional links are visible by checking if a user is authenticated. This happends in src/views/Home.vue.
In the lifecycle hook mounted() we ask the authentication service (which we added in src/auth.js to the global Vue instance) if a user is logged in.
mounted () {
  this.$auth.isUserLoggedIn()
    .then(isLoggedIn => {
      this.isUserLoggedIn = isLoggedIn
    })
    // If somehting goes wrong we assume no user is logged in
    .catch(error => {
      console.log(error)
      this.isUserLoggedIn = false
    })
We keep track if a user is authenticated in the prop isUserLoggedIn. This prop can than be used to decide if the links are displayed. (In a real world application I would store this information in the vuex store.)
<router-link
  v-if="isUserLoggedIn"
  to="/protected"
>
  Protected |
</router-link>
<router-link
  v-if="isUserLoggedIn"
  to="/profile"
>
  Profile
</router-link>
If the user navigates to the Profile page the users sees some information about themself. This information is directly extracted from the access token that we received from Keycloak.
Thanks to the oidc-client all we have to do to get the information is to ask the UserManager for it. This is done in src/auth.js.
getProfile () {
  return new Promise((resolve, reject) => {
    userManager.getUser()
      .then(user => {
        if (user === null) {
          resolve(null)
        }
        resolve(user.profile)
      })
      .catch(error => reject(error))
  })
In our case the user can see its username and the assigned roles.
For the user peter it looks like this:
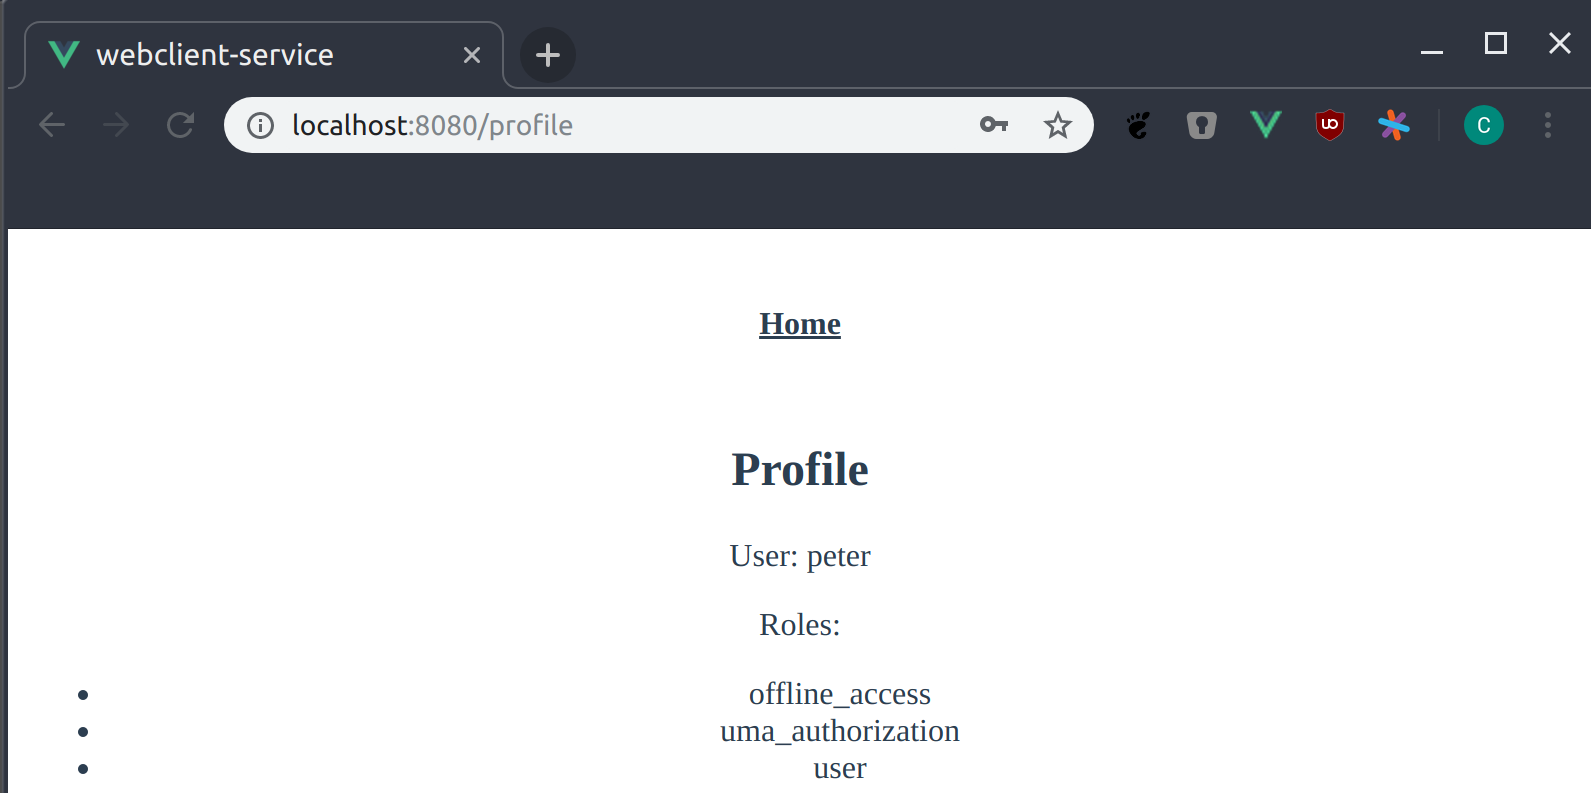
The first thing you can see is that I can’t design user interfaces. The second thing is that peter has the role user assigned.
After going back to the main page we will visit the Protected page.
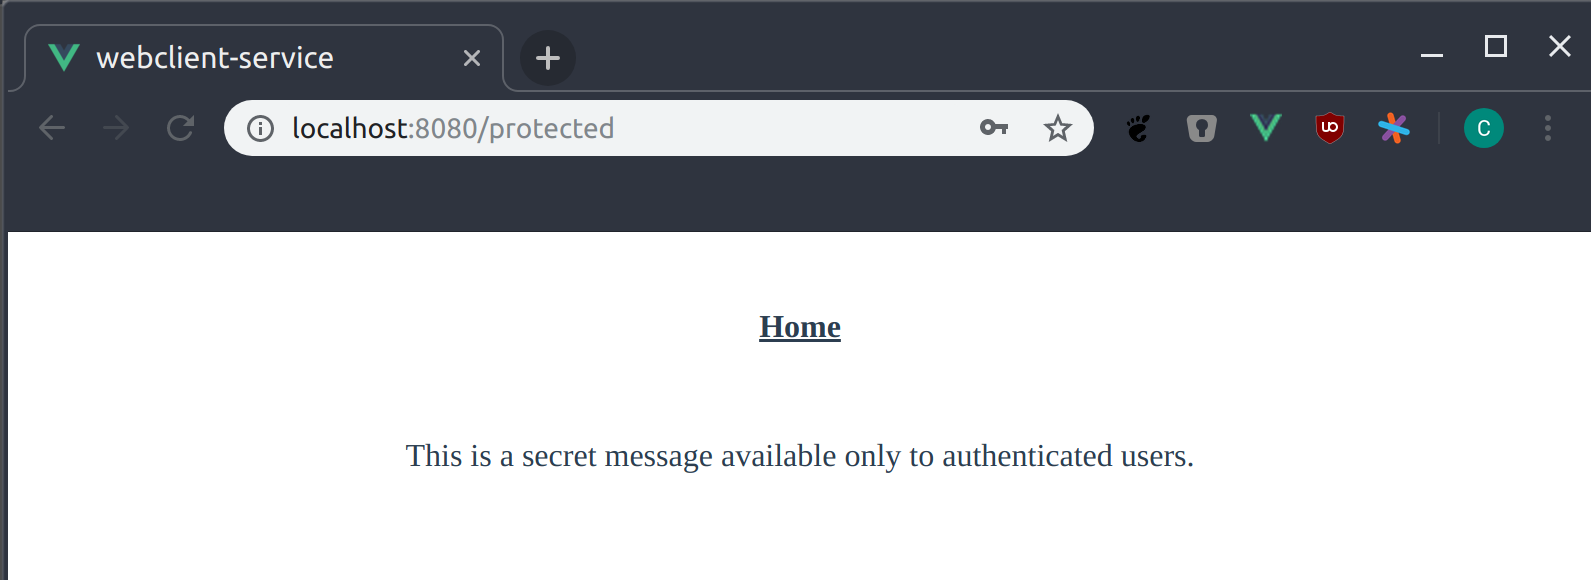
This is where we finally use our access token to send a request to the backend and show the result.
This consists out of two parts:
- For each request send to the backend we have to include the access token.
- For each request received on the backend we have to verify the token and check if the user is allowed to receive a response for the given request.
On the client this is done in src/api.js.
/**
 * Initializes the interceptors to include the authorization header with each outoing request.
 */
export function initAxios () {
  // Add the bearer token to all outgoing requests
  axios.interceptors.request.use(async (config) => {
    let accessToken = await authService.getAccessToken()
    config.headers.common.Authorization = 'Bearer ' + accessToken
    return config
  })
}
This method is called once in the created() lifecycle hook when creating the Vue.js instance in src/main.js.
What happens is that for each request we make the Authorization header is automatically added and set to our access token. Having this interceptor is nice since we don’t have to add the header to every request manually. If you send requests to different servers you could extend this method to only add the Authorization header if it is a request to your backend.
The backend side is even simpler. Quarkus does it all for us. We only have to provide the Keycloak config and tell each endpoint who can access it.
This is done by adding the RolesAllowed annotation to io.betweendata.ProtectedResource.
@Path("/")
@RolesAllowed("user")
public class ProtectedResource {
  @Inject
  KeycloakSecurityContext securityContext;

  @GET
  @Produces(MediaType.APPLICATION_JSON)
  @Path("/secretMessage")
  @NoCache
  public SecretMessage secretMessage() {
    return new SecretMessage("This is a secret message available only to authenticated users.");
  }
[...]
If you want to learn more about the backend side of things I recommend to work through the official Quarkus Keycloak Guide.
The last screenshot above shows the page how it looks for peter. But what about susan? She does not have the role user assigned.

Susan sees a different message telling her that she is not authorized to see the secret message. But other than for peter the message for susan was not send by the backend.
What happens is that the backend received the request for the secret message including the access token for susan. But since this access token does not contain the role user the backend denies the request with HTTP Code 403 Forbidden. You can see this if you open the console of your browser.
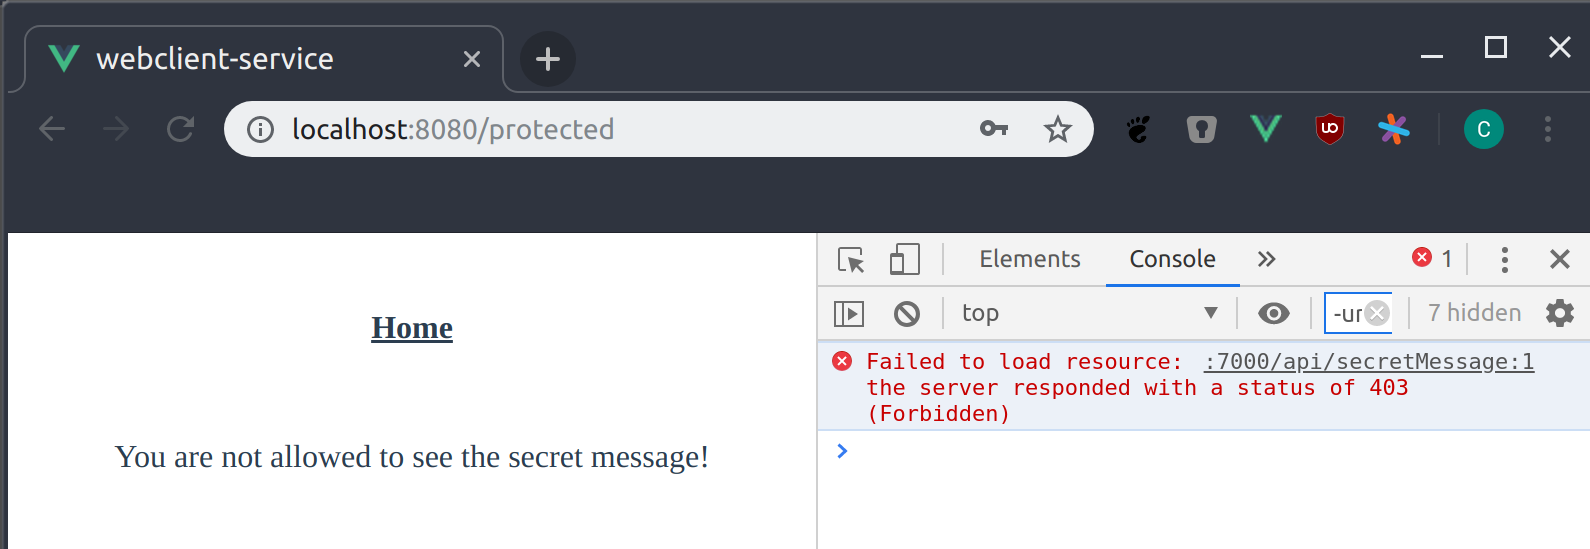
We handle this error and just show a generic message. This happens in src/views/Protected.vue.
getSecretMessage()
  .then(response => {
    this.message = response.data.message
  })
  .catch((error) => {
    if (error.response.status === 403) {
      this.message = 'You are not allowed to see the secret message!'
    } else {
      this.message = ''
    }
  })
Summary
This post showed you how to add OAuth 2.0 to your Vue.js application and use it to authorize backend requests. Thanks to the available libraries all we have to do is “stick them together”.
If you have any doubts, questions or found a mistake, please do not hesitate to send me a mail.
References
The following references and resources helped creating this post. I encourage you to check them out.
- https://www.storyblok.com/tp/how-to-auth0-vuejs-authentication#auth0-callback-route
How to handle the login/logout callback. - https://www.scottbrady91.com/Angular/Migrating-oidc-client-js-to-use-the-OpenID-Connect-Authorization-Code-Flow-and-PKCE
How to configure the oidc-client. - https://github.com/joaojosefilho/vuejsOidcClient
Another example for the Vue.js side of the OAuth implementation. MyAuthServiceis basically a simplified version of his. - https://www.jerriepelser.com/blog/using-auth0-with-vue-oidc-client-js/
Another Vue.js ‘oidc-client’ example. - https://tools.ietf.org/html/draft-ietf-oauth-browser-based-apps-03
Best practice on how to implement authentication for web application by the IETF. - https://tools.ietf.org/html/rfc7636
Explanation how PKCE works. - https://medium.com/easyread/vue-as-event-bus-life-is-happier-7a04fe5231e1
How to implement an event bus in Vue.js. I use this too keep track if a user logged in or out. Seesrc/eventBus.js.